
Freezer Camp
Welcome back to the farm. This is the third installment of our meat chicken project. As with any project we do, our plan is to be open and honest about the good, bad, and ugly of what it took. This aspect of the project was the toughest for many reasons that we will get in to in a bit. It also covers two separate days two weeks apart. The first was a trial run to make sure I had everything I needed and the second was a full day of processing.
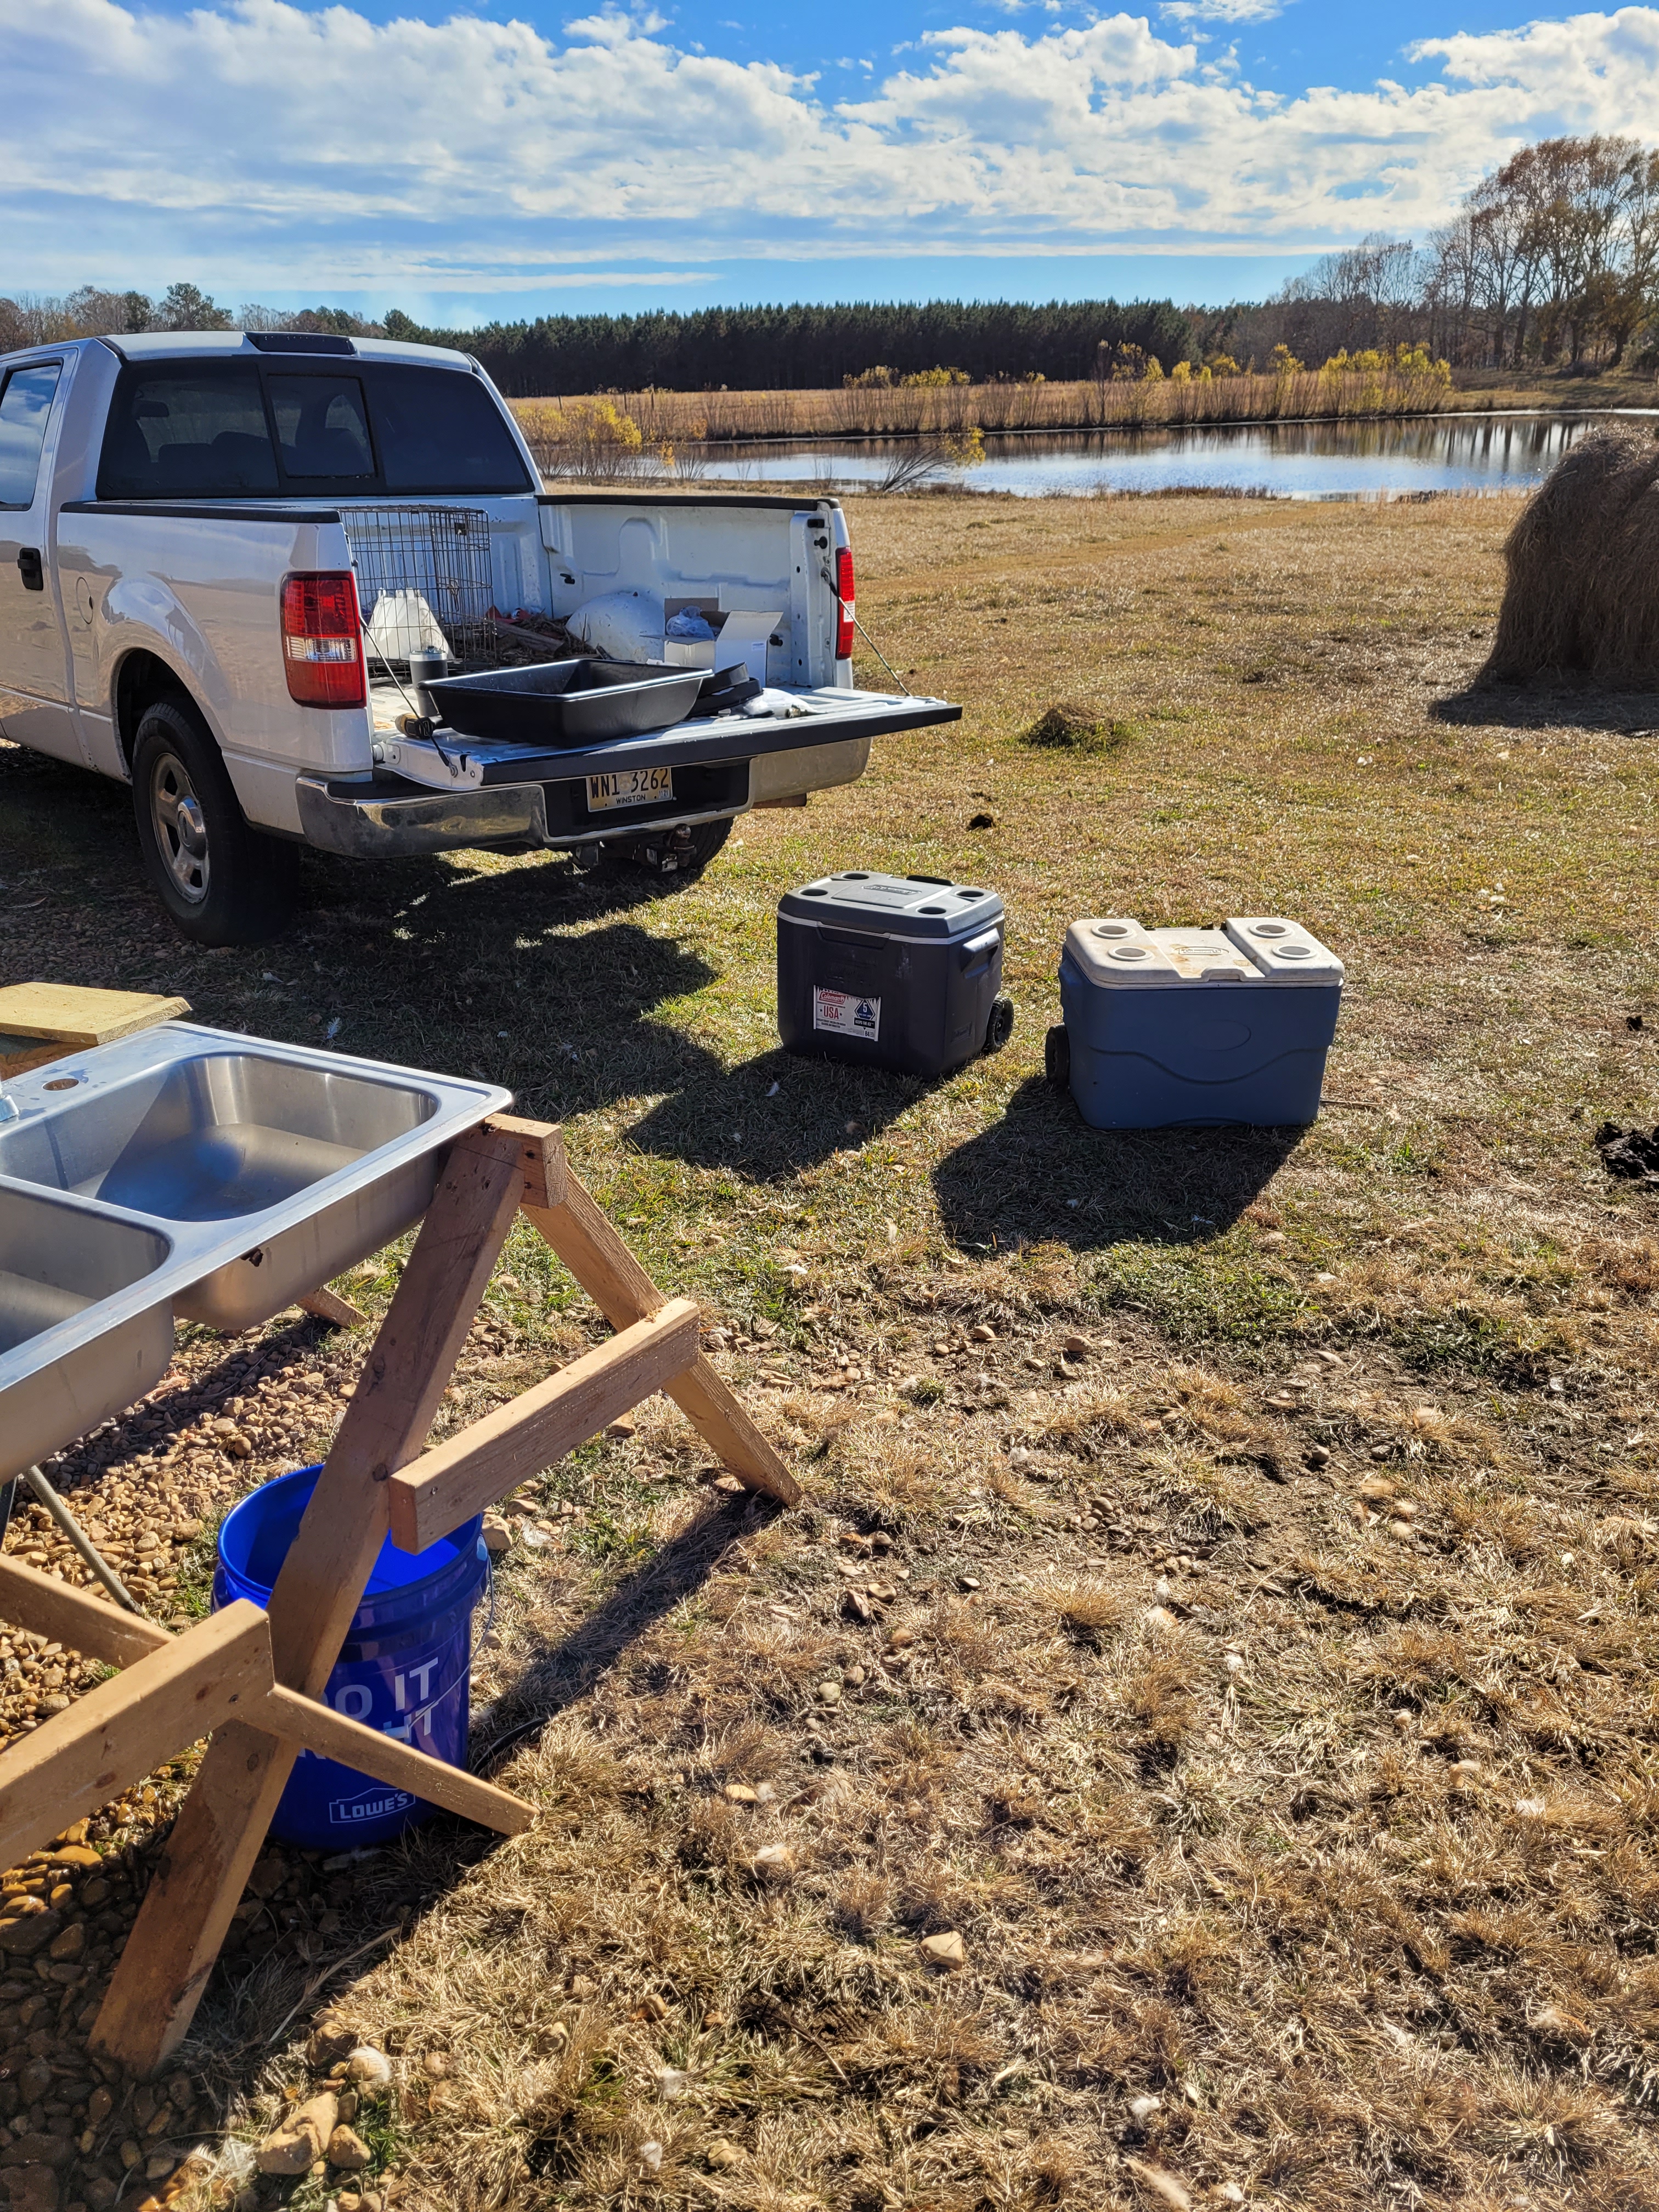
The processing of birds can be done many ways and can range from no cost or setup to thousands of dollars in equipment and hours of setup and clean up. Since this was our first foray into meat birds the uber expensive route was out. We were just trying to see if this is really for us and if we liked it enough to possibly invest in that infrastructure for the future. Also, with more than just a handful of birds, we did want some automation to speed up the process and understand how much those things helped from just chopping the head off and plucking the bird by hand.
First, I am going to describe my set up and explain my choices and how they worked and then we will go process by process and cover thoughts for the future.
I went at this from a budget friendly path, so there was a lot of DIY and alternative use of things. This helped and didn’t help the process all the same.
For killing the birds a few pieces of equipment are required and some are optional. The only things really necessary for this process are a knife and a way to hold the bird in a way you can get access to the neck for an efficient and humane kill. In old days of homesteaders harvesting a bird for supper there was usually an old stump or log with two nails driven in it about an inch apart. This allowed the head of the bird to be caught on one side and the neck pulled taught while the farmer chopped or sliced the neck killing the chicken.
In my setup I used a killing cone I made from a plastic trashcan as a means to hold the chicken upside down to encourage blood draining and it hugs the birds tight to limit movement during death throws and also calms the bird prior to dispatching it. In addition to the cone, I hung a bucket under the cone with some water in it to catch the blood and keep it from clotting. This was collected and put into our compost pile to enrich our soil and further regenerate our land. To do the actual deed I used a sturdy fixed blade knife that I sharpened to a fine edge prior to starting.
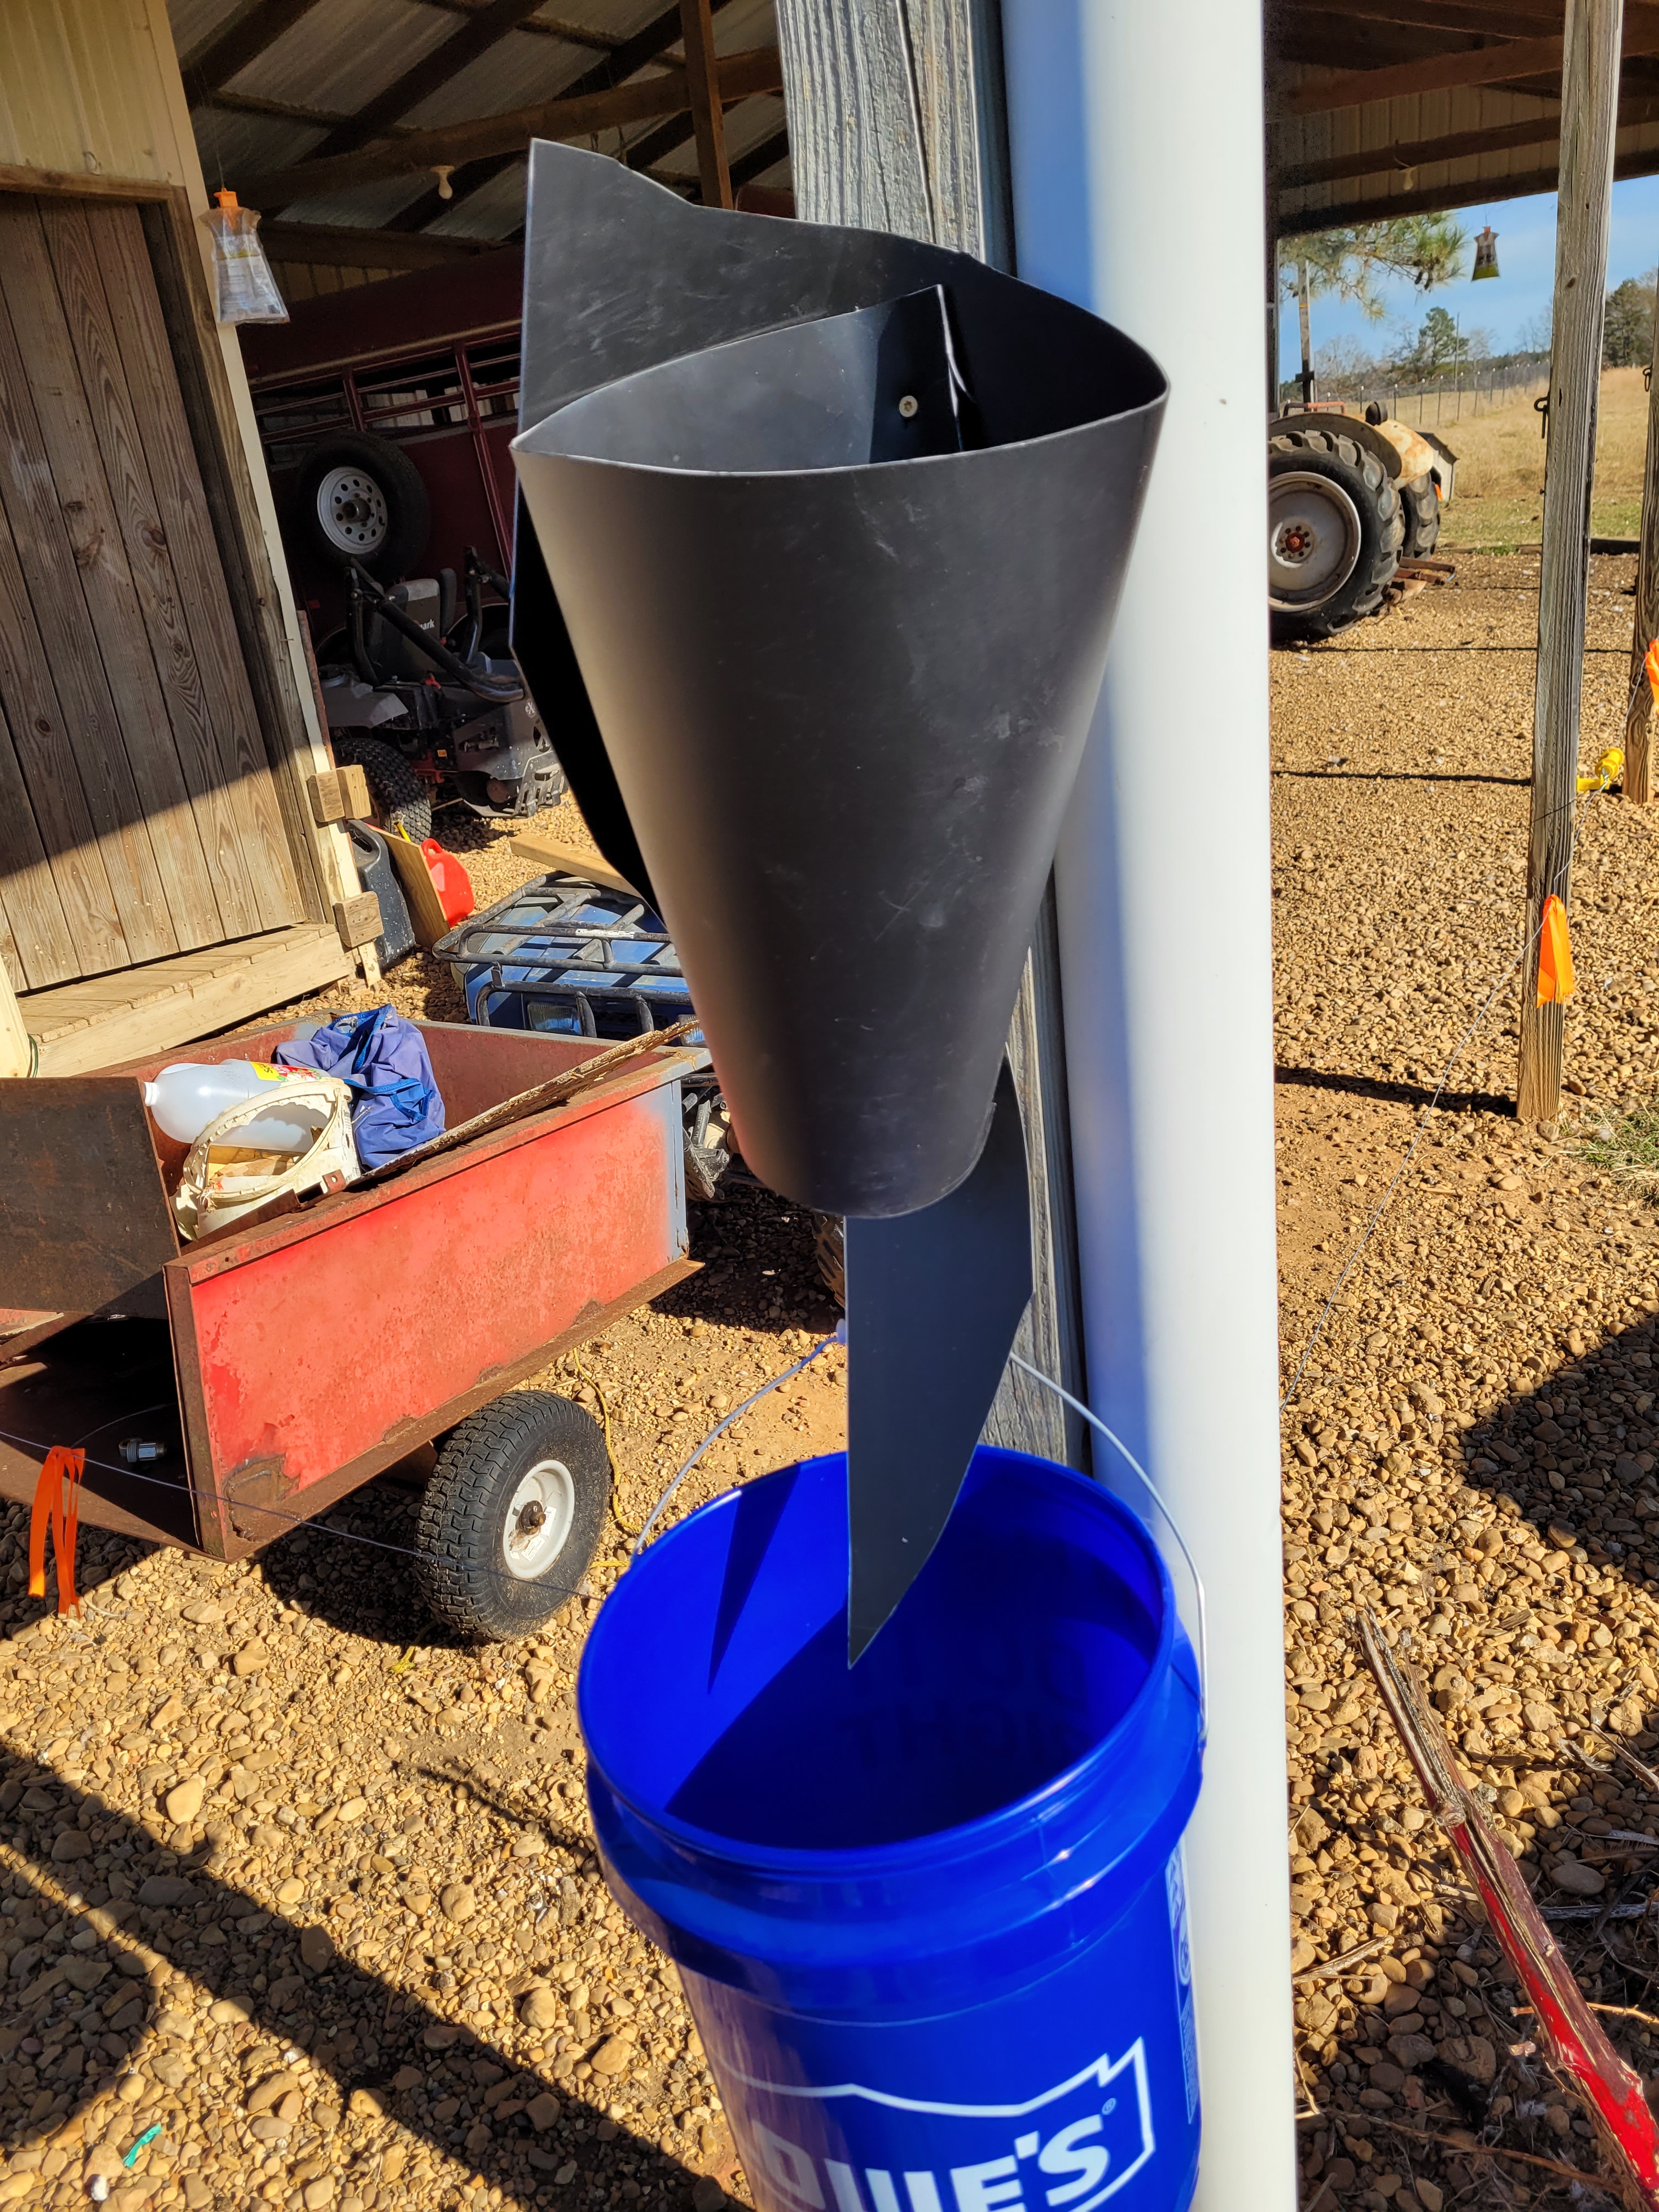
In the future I will spend the money to buy a properly made killing cone that is likely metal. Mine was a little big for the first day of harvesting and didn’t hold the birds as well as I would have liked. Also, I will likely get a knife that has a replaceable scalpel blade setup to ensure better more consistent cuts. This will ensure that there is no instance where a bad cut is made and a chicken suffers.
The second step of the process is scalding. This involves submerging the carcass in hot water to loosen the feathers and make plucking much easier. The water needs to be between 135°F and 150°F. Care must be taken to not leave the bird in the hot water too long as the skin will cook enough to come off very easily. This step is very delicate and the most expensive to automate. A dedicated scalder can cost more than a thousand dollars.
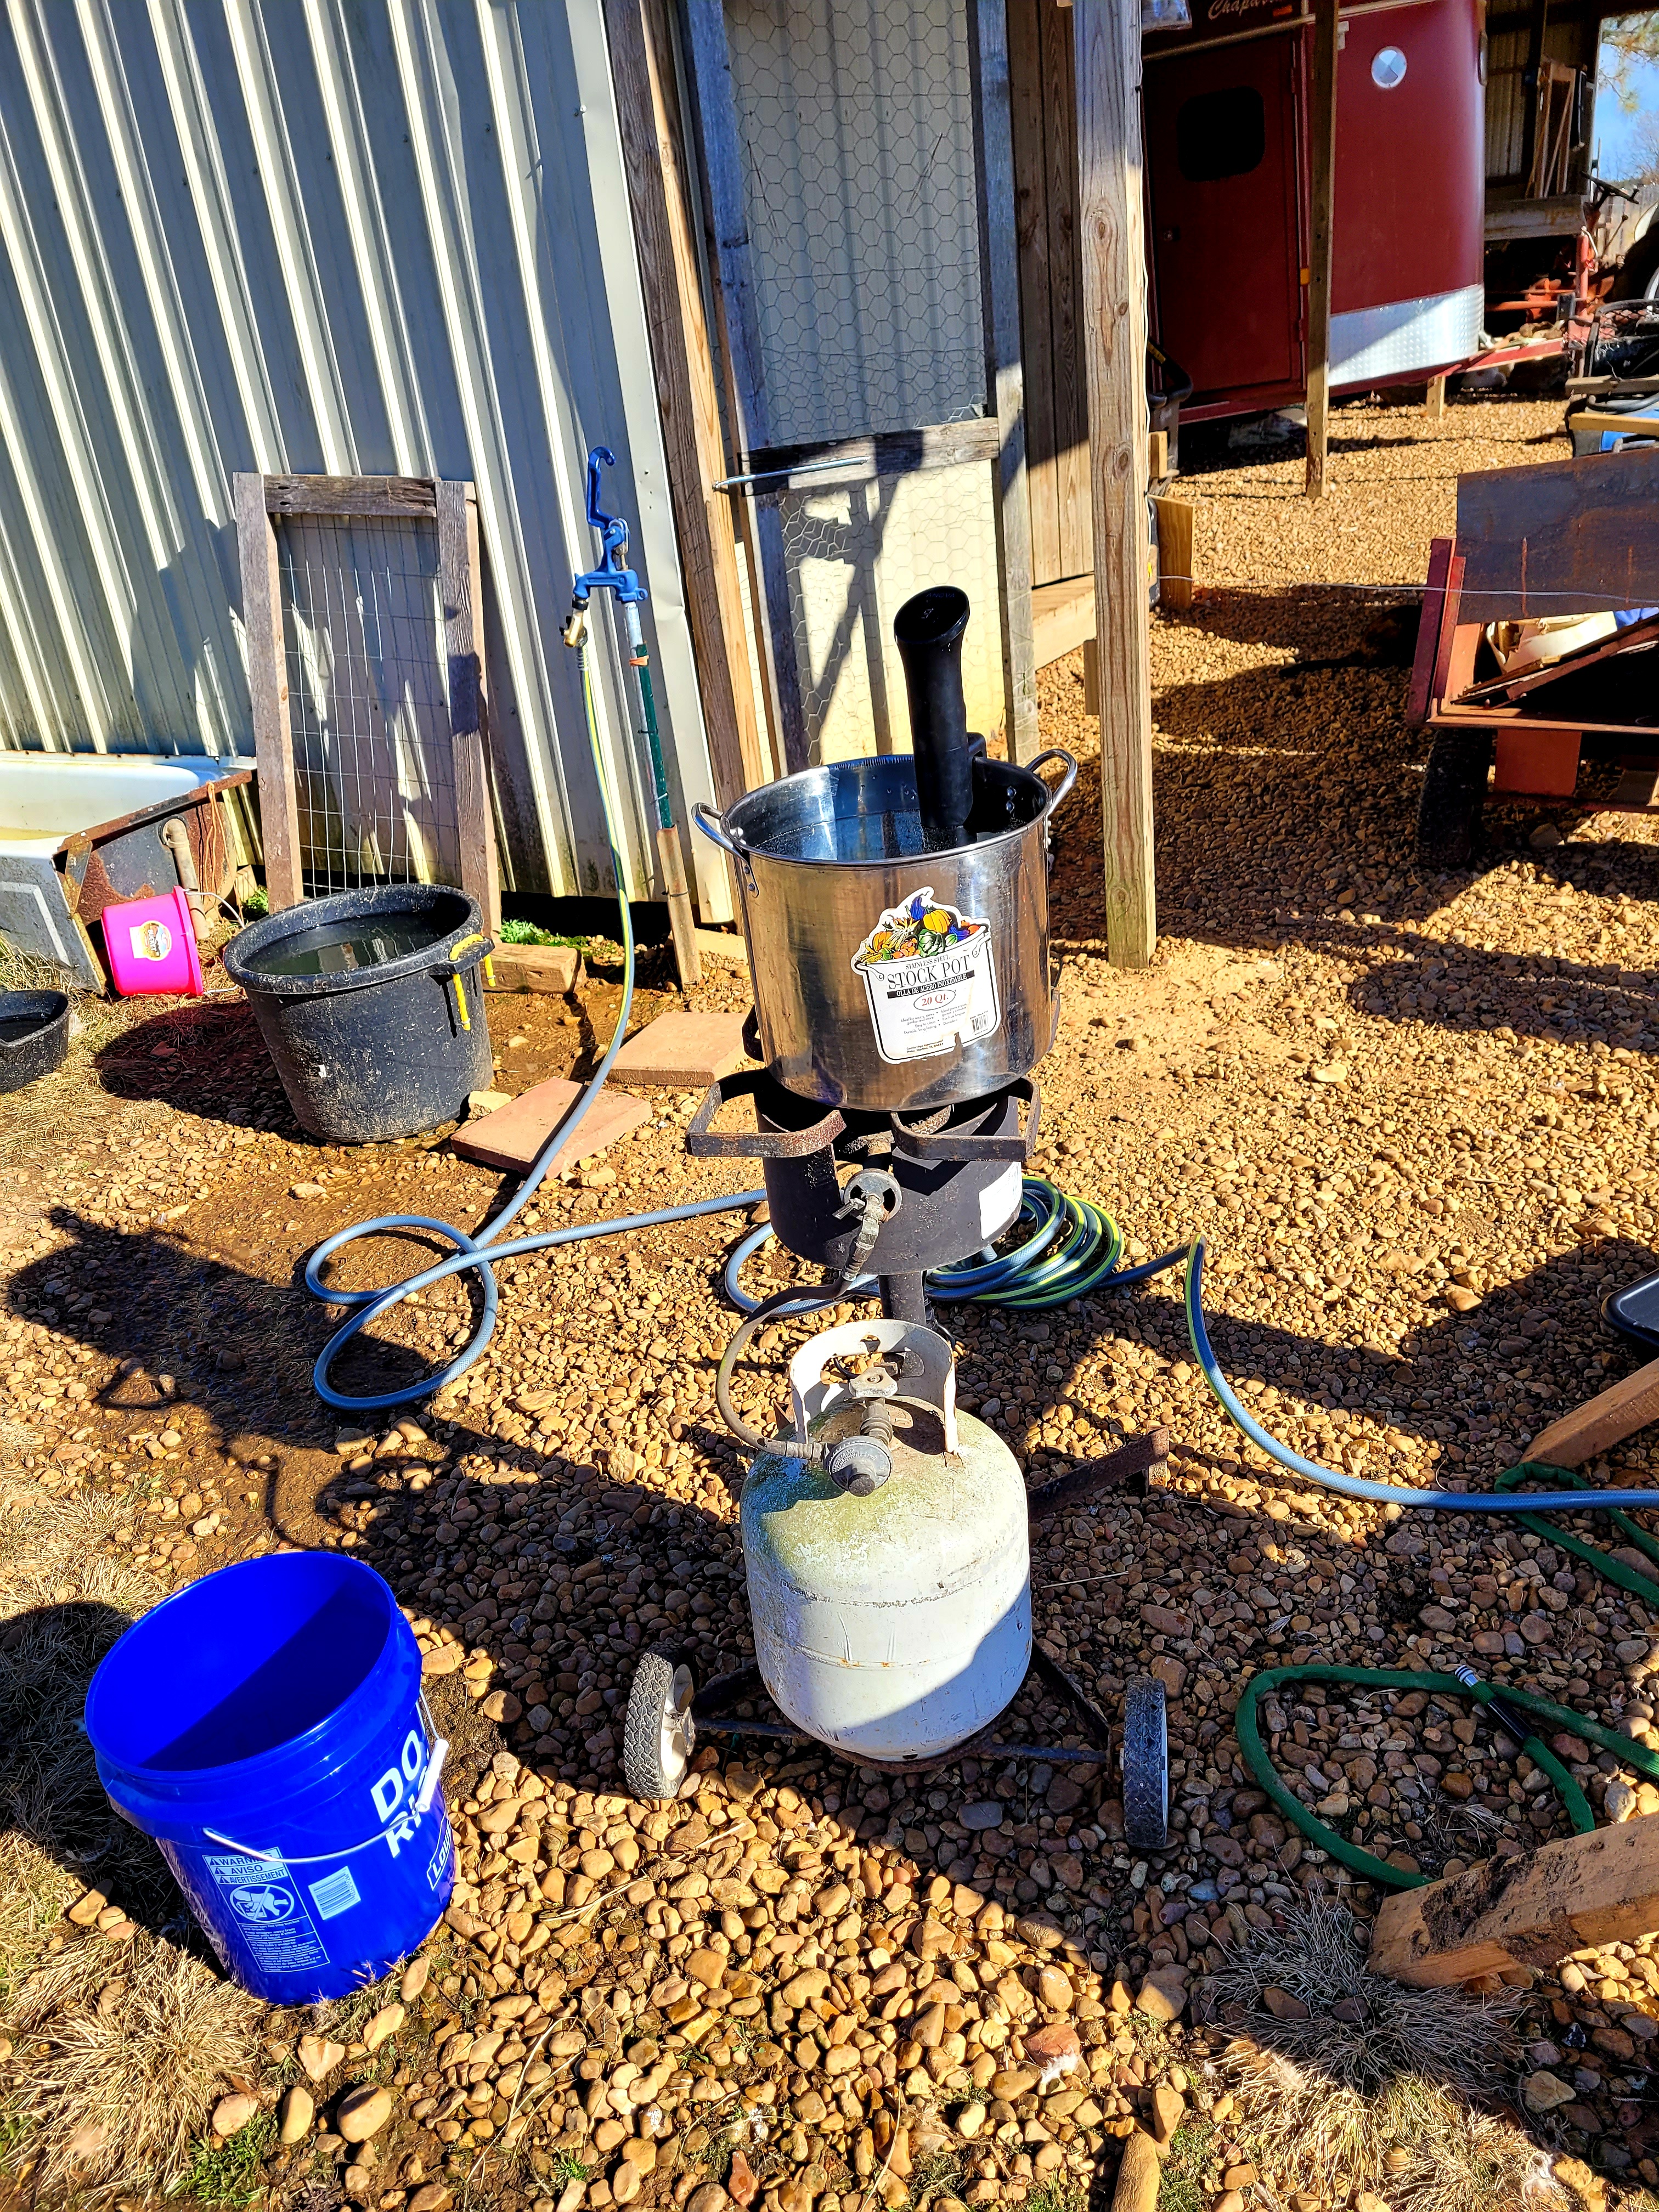
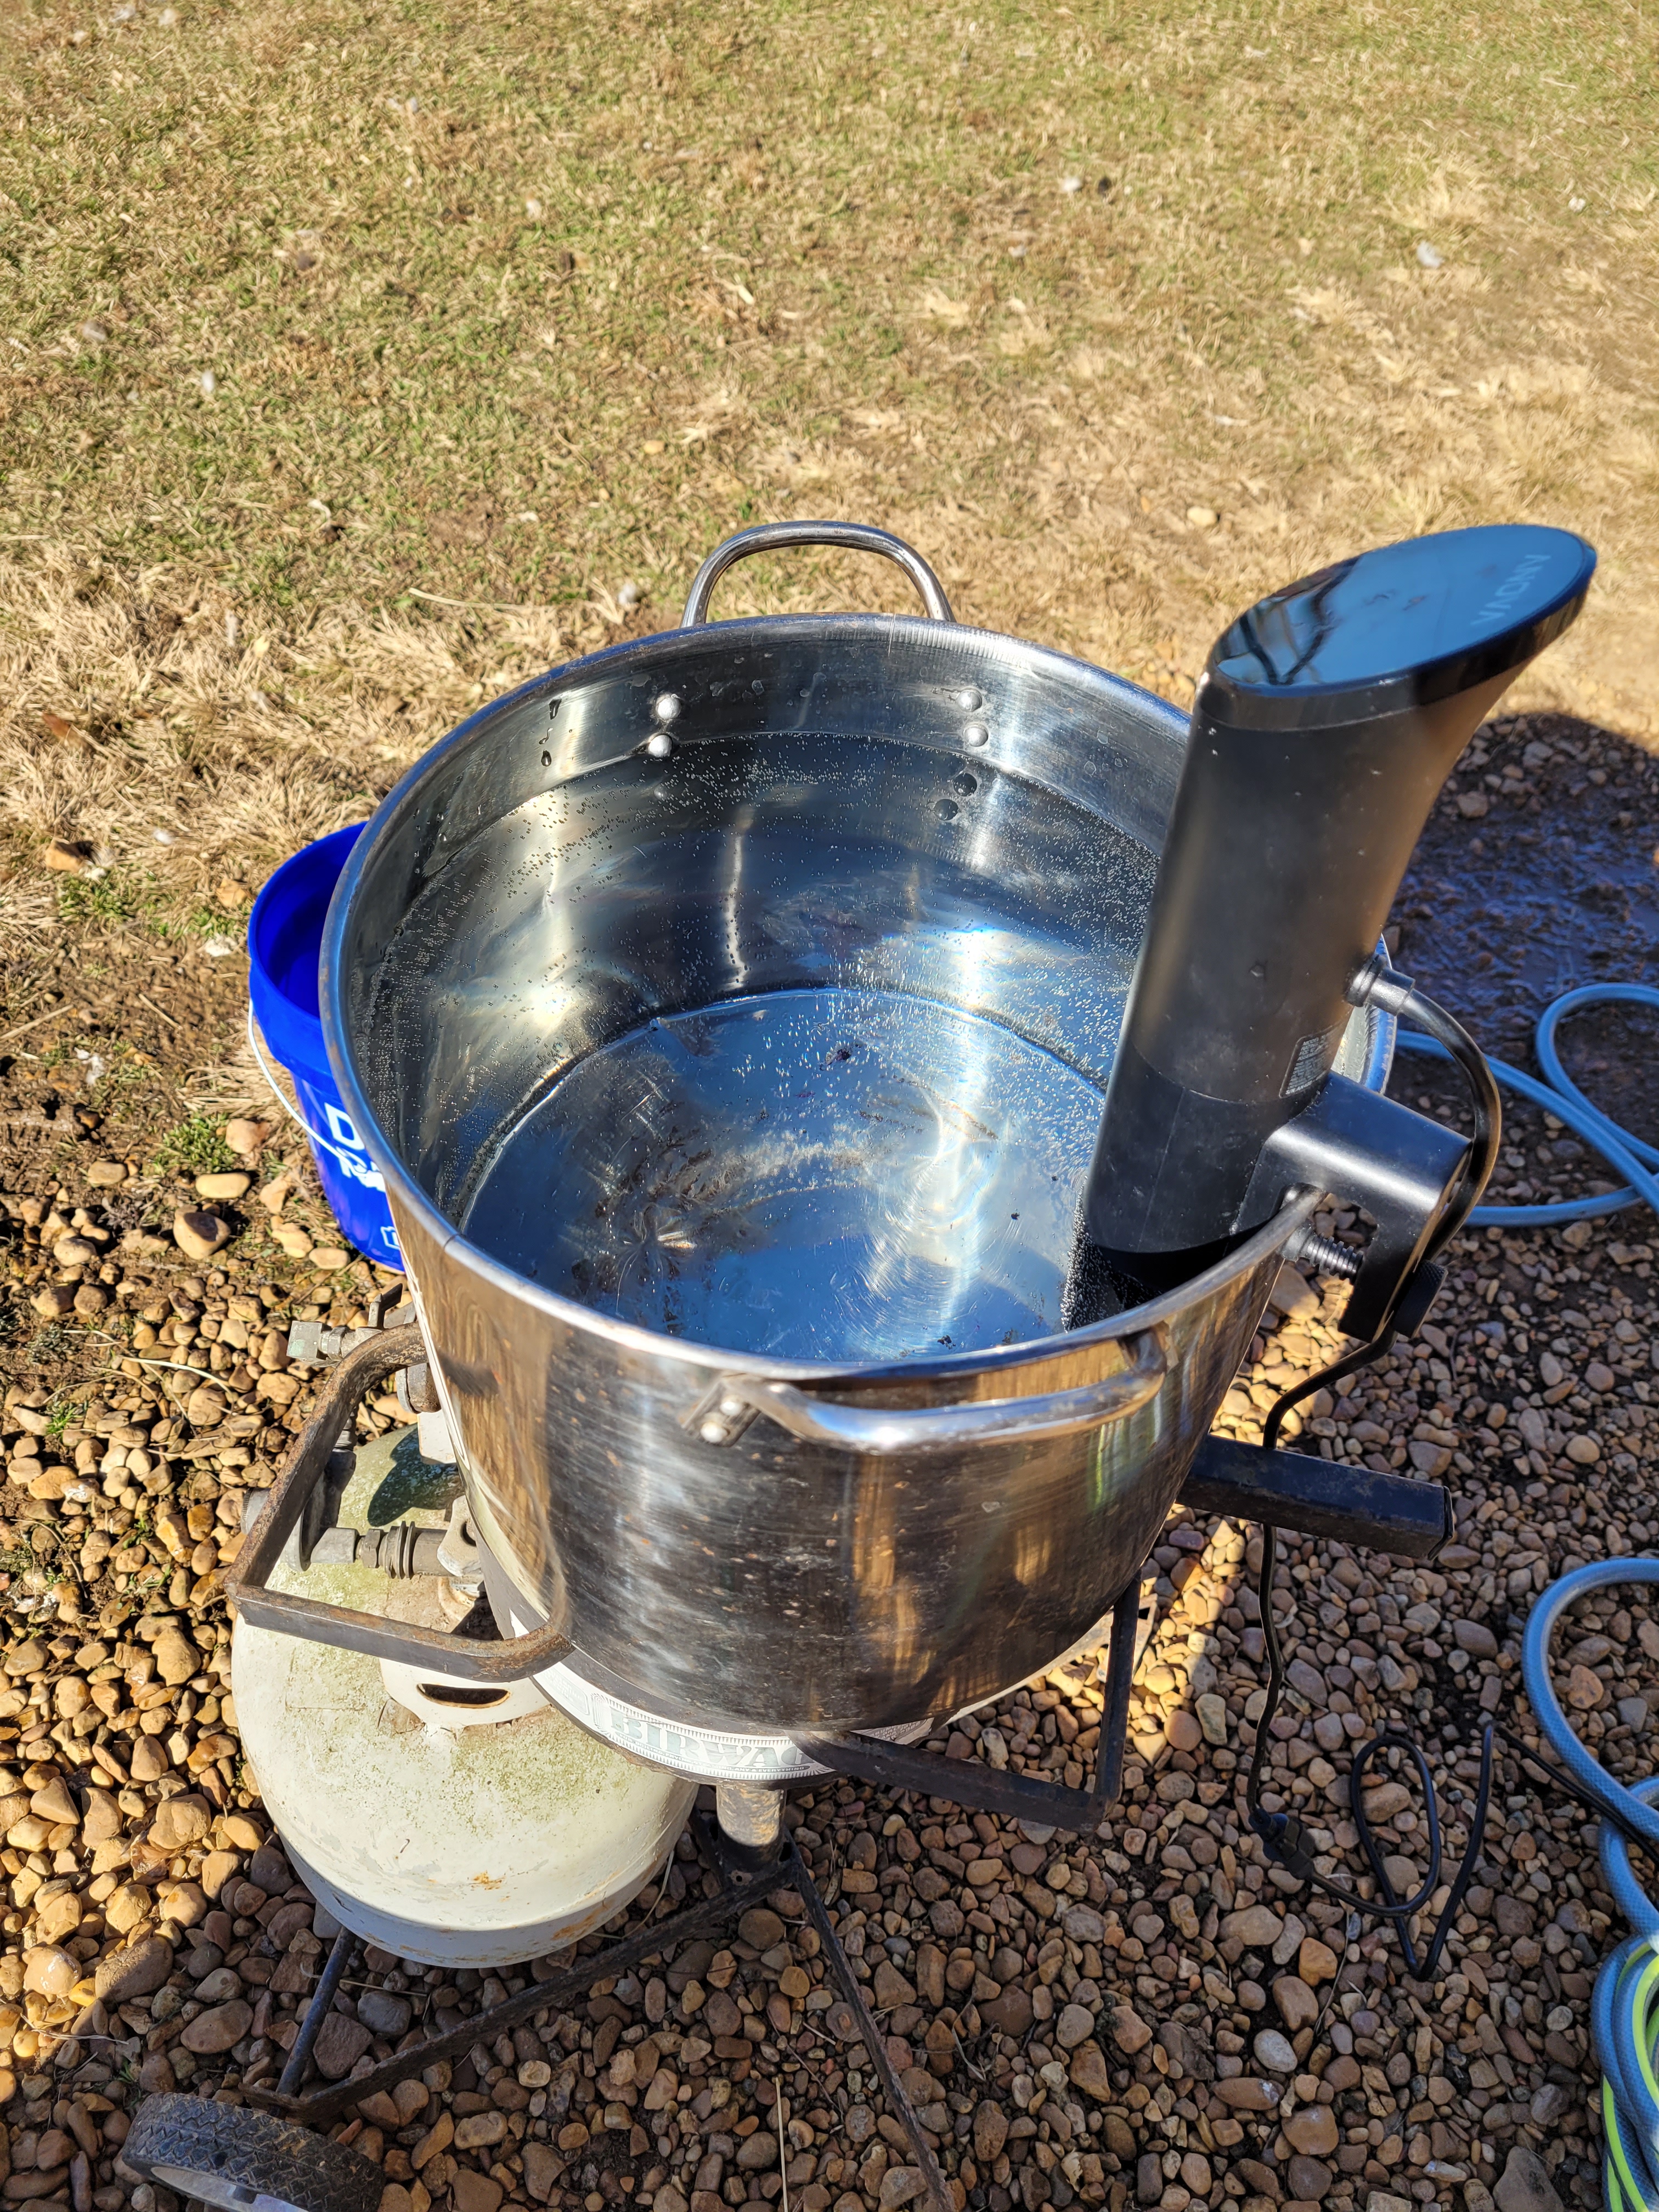

I used a propane burner and a larger stock pot the first time with a sous vide cooker as well the first day. The stock pot had too much water to quickly heat with the sous vide cooker and would over flow when the bird was added. The propane burner heated the water too quickly and it would cool too much between birds with the pot I had. Other wise the process worked great and I only lost the skin on one bird. The second day I processed I borrowed a larger pot that took longer to heat up but held its temperature better.
Once the birds were scalded, they were ready to be plucked. Commercially available pluckers range from call drill powered attachments all the way up to the expensive ones capable of multiple birds at once. There are even plans for DIY pluckers that can you can build for much less than the commercially available ones. The pluckers use rubber fingers one either a drum or plate that spins and it grips the feathers in the grooves of the fingers pulling them out.

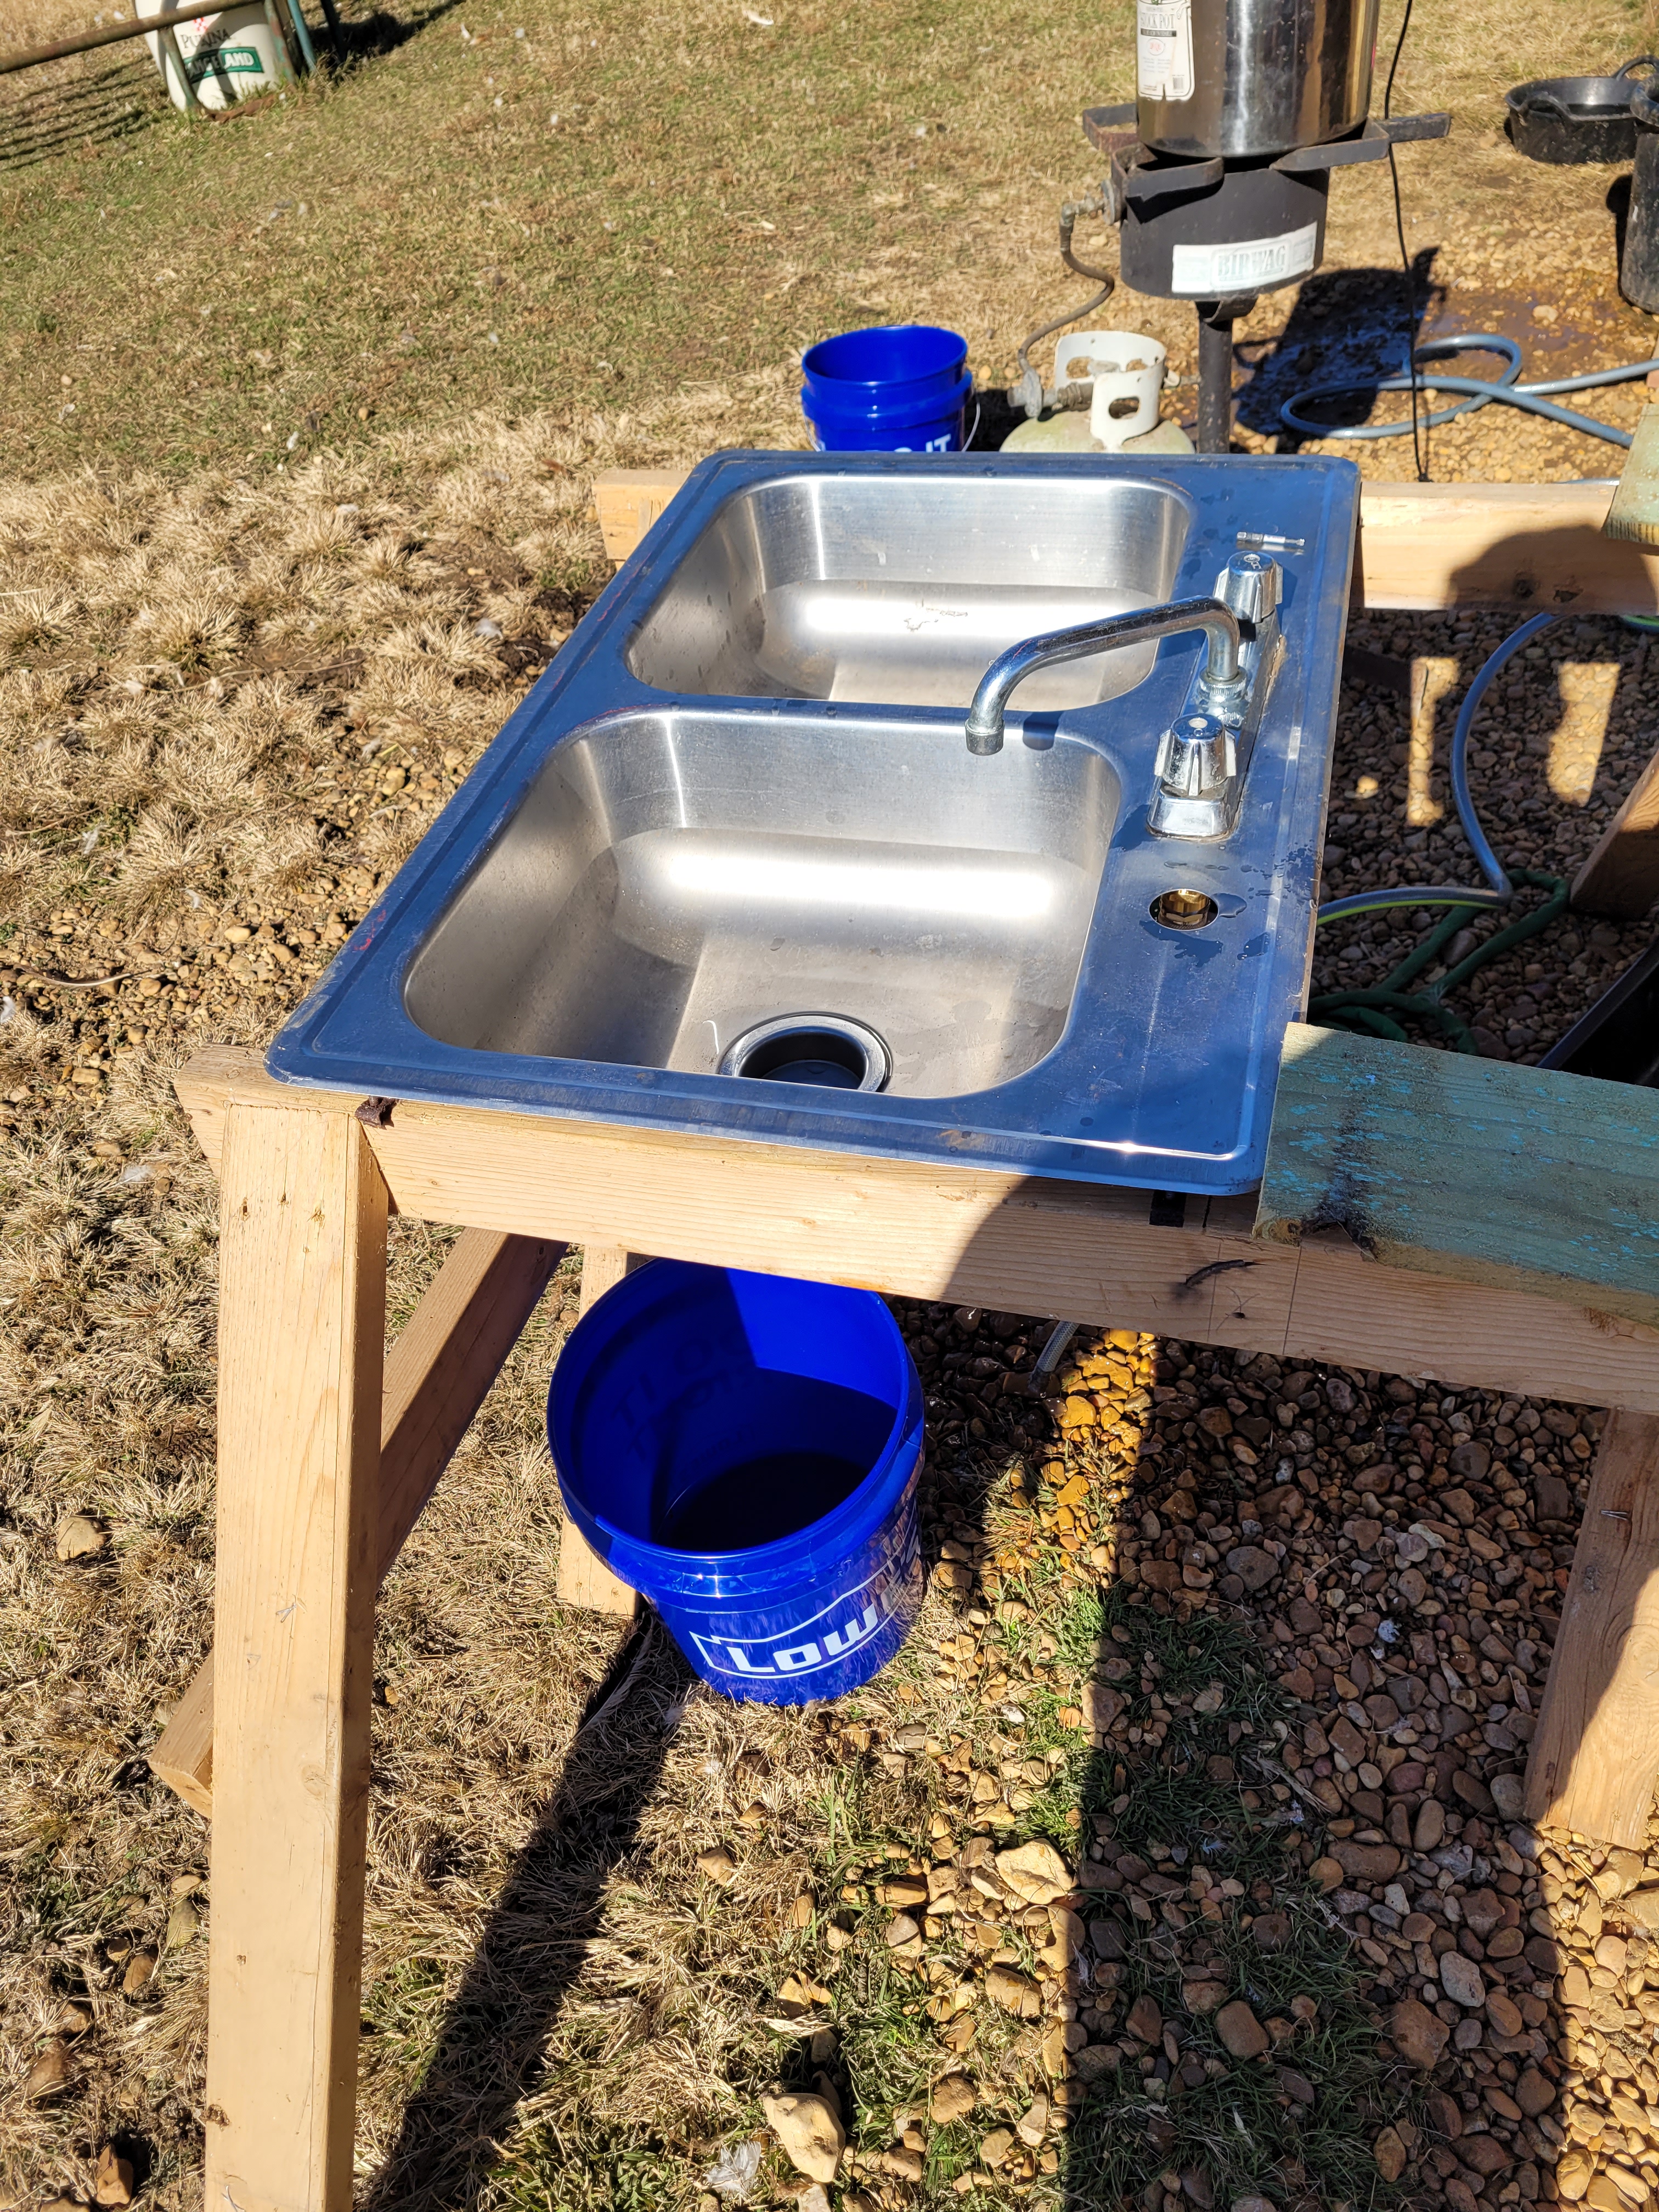
I opted to use a small drill powered plucker again to save money and while it was the right option for the time, I have already begun gathering parts for a DIY version that will handle two to three chickens or a single turkey. The drill plucker worked okay at best. It was adequate at the breast and back feathers but completely useless against wing and side feather. This resulted in a half-plucked chicken that I spent about another twenty minutes plucking by hand. This was easier with the old kitchen sink I set up on saw horses and plumbed with a water hose and a five-gallon bucket to catch the drain water.

With the birds plucked all that is left is the gutting and packaging. The offal I collected in a small concrete mixing tray and also buried it in the compost pile to add to our soil’s health. This step is fairly straight forward and really all that is needed is a good knife. I used the same one I use for the first cut. Next time I will have a separate knife for this step just to maintain a sharper knife for that first cut.
Once the chickens have been prepped for packaging, I placed them in ice water until all was done for the day and I took them in and placed them in the shrink bags. These bags, once sealed with a zip tie around a removable straw and submerged in 190°F water, shrink tight to the chicken preventing freezer burn. The first time I processed, I completed the process but when I cooked one it came out a little tough. Through research I found it is best to let them rest in ice water over night before packaging and freezing.
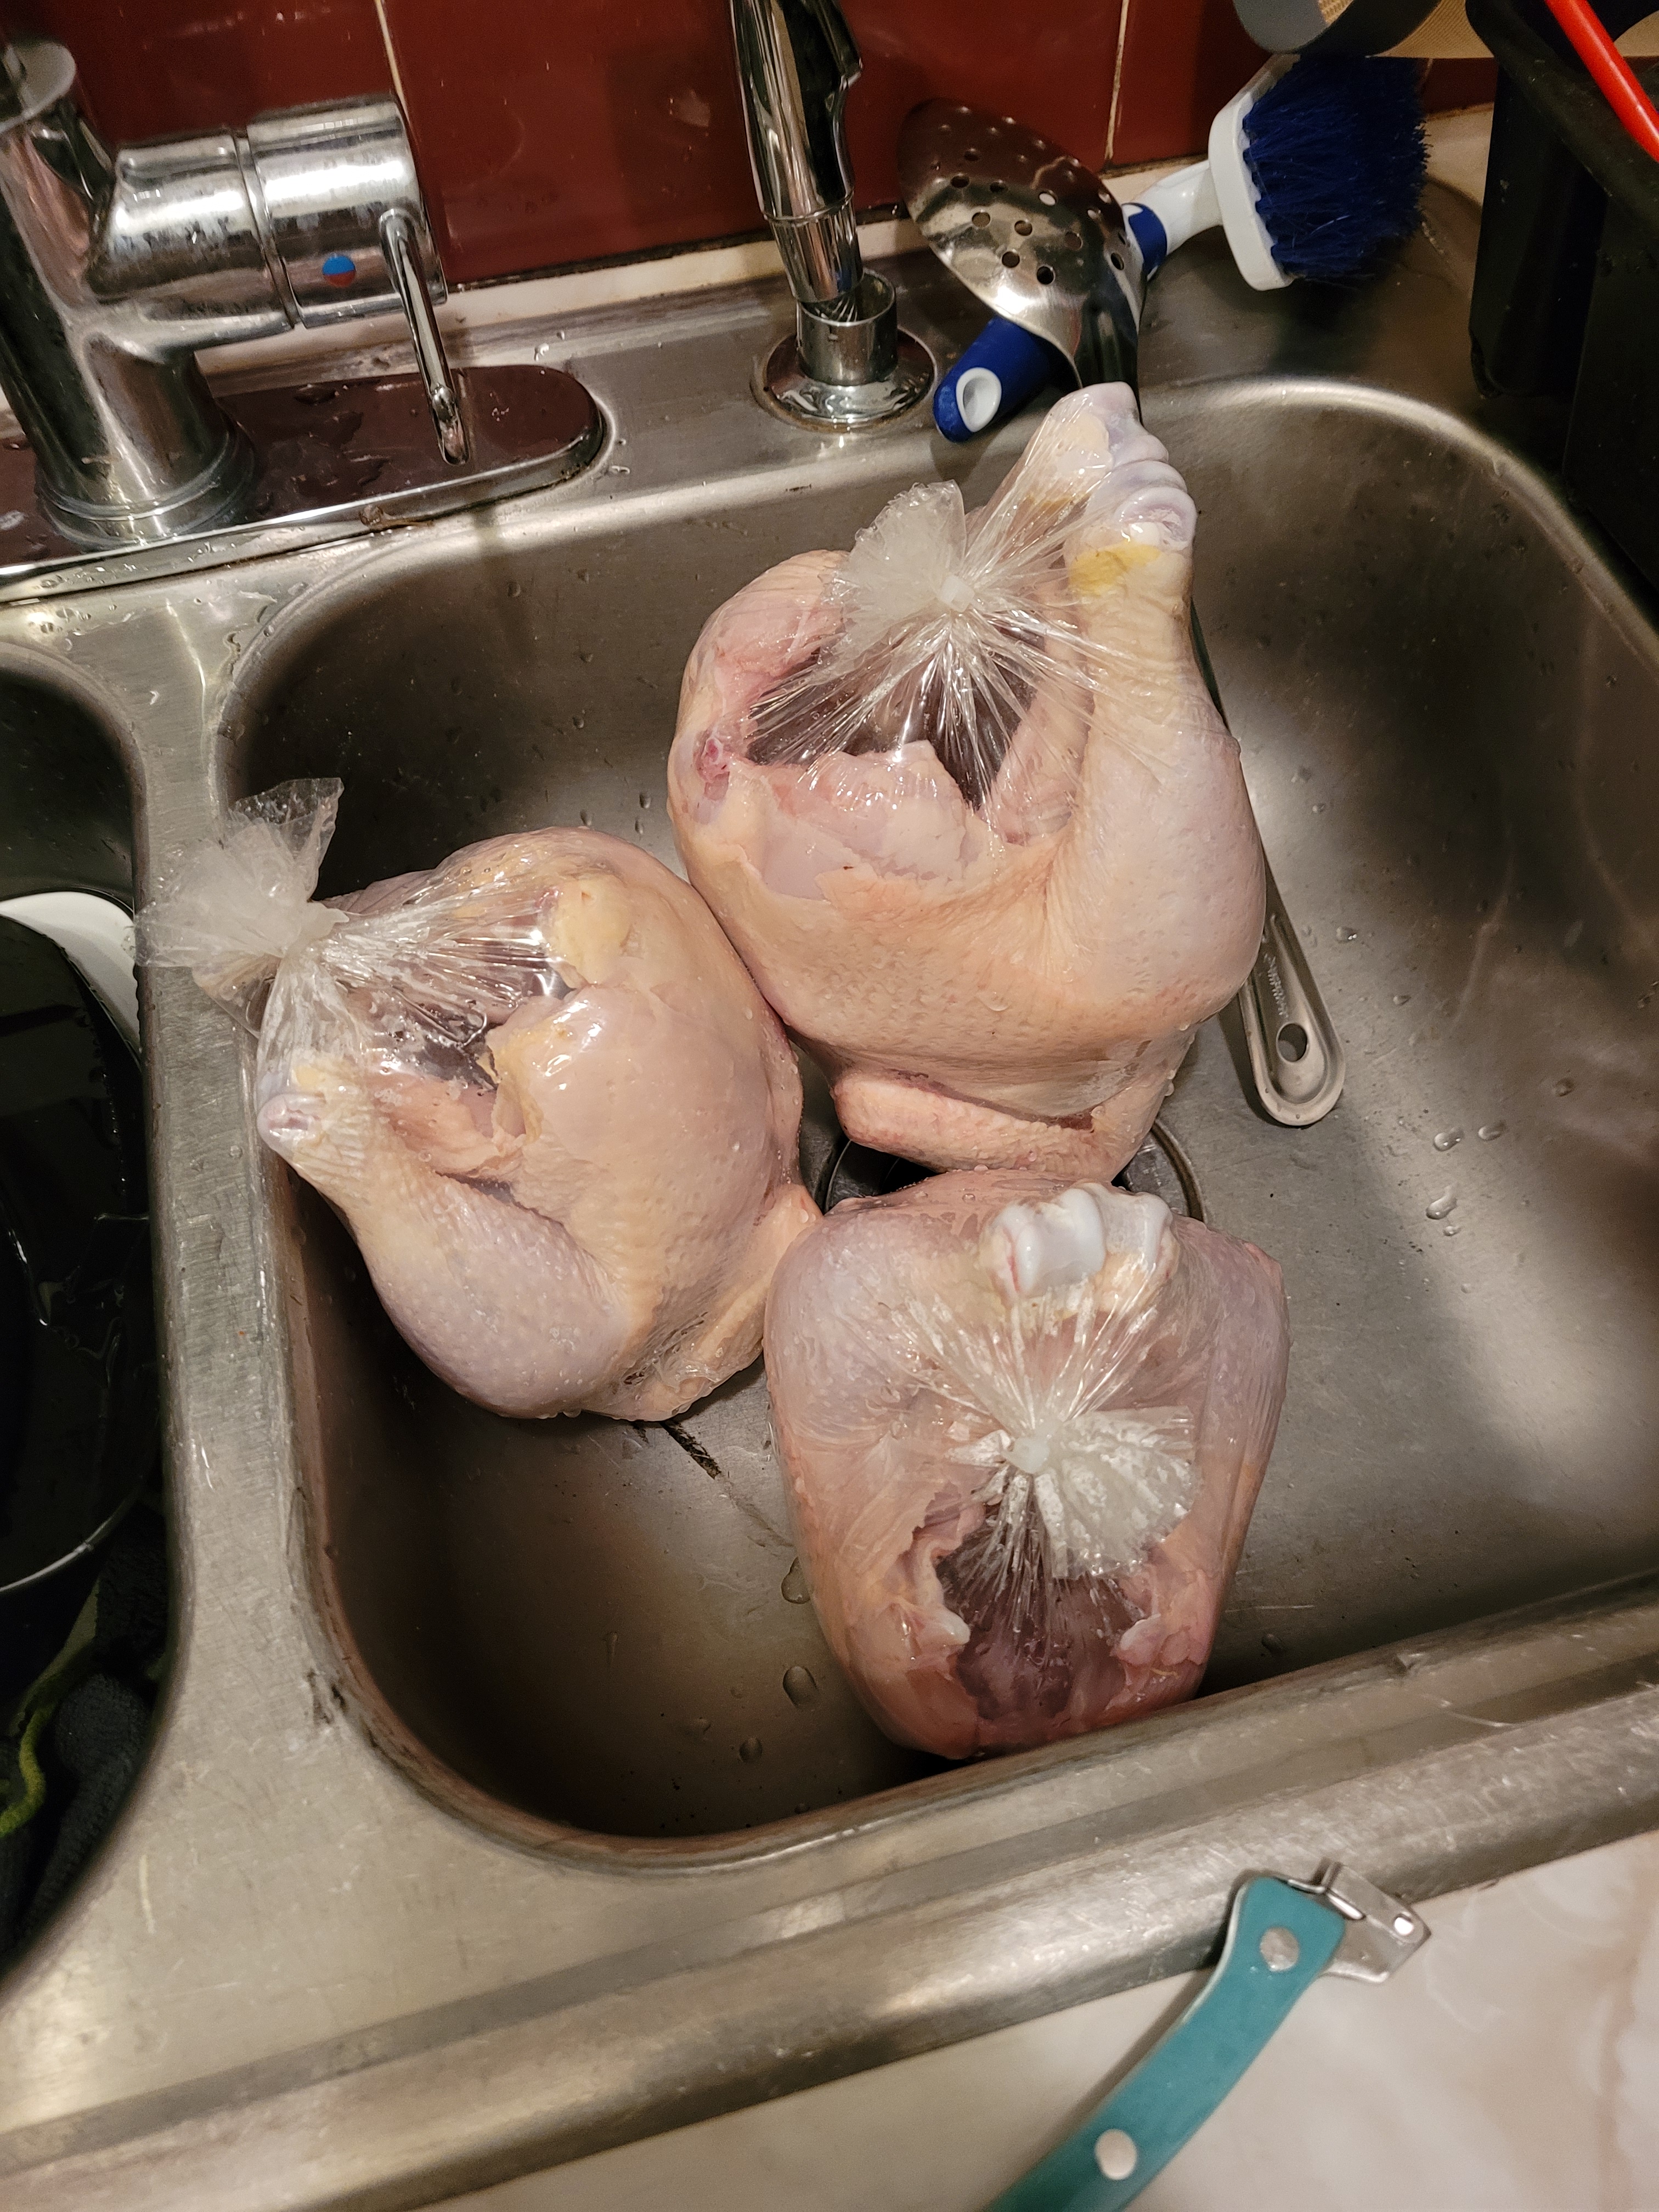
I did this with the remaining birds and hope to test one out soon to see if it improved the tenderness or if the birds were just too old to be tender. I will be doing that test as a blog as well so be sure to come back and see how it worked out! Until then have a sunflowery day!
