The Chicken Tractor
With the brooder completed just in time, our new chicks arrived on schedule and began growing quickly. We ordered thirty Cornish-cross (CC) meat chicks and opted for the one mystery chick. What arrived was thirty-three CC meat chicks and the mystery chick (sending a few extra meat chicks is normal due to the breed and stress shipping that can cause some chick death at or after arrival) all safe and sound. The next morning, we did have two CC chicks dead but everyone else looked healthy and happy.
Over the next three to four weeks, we fed, watered, and watched them grow. As they grew, we expanded the brooder to allow them more room. During this time, we began planning for the next stage of their lives. The chicken tractor. No, not like an actual tractor!
In the regenerative agriculture space that we are trying our best to grow into, chicks are raised on pasture. This does a few things. First, it allows the birds to vary their diet outside of the grain we feed them. They can eat seeds, grass, and any bugs that they find. Secondly, it both concentrates and distributes their manure in a controlled manner. Some say a healthy chicken will poop ten to fifteen times a day. Grouping up thirty plus birds and concentrating their area of access and moving it daily to allow fresh grass and new places to poop helps restore soil and rebuild pasture land.
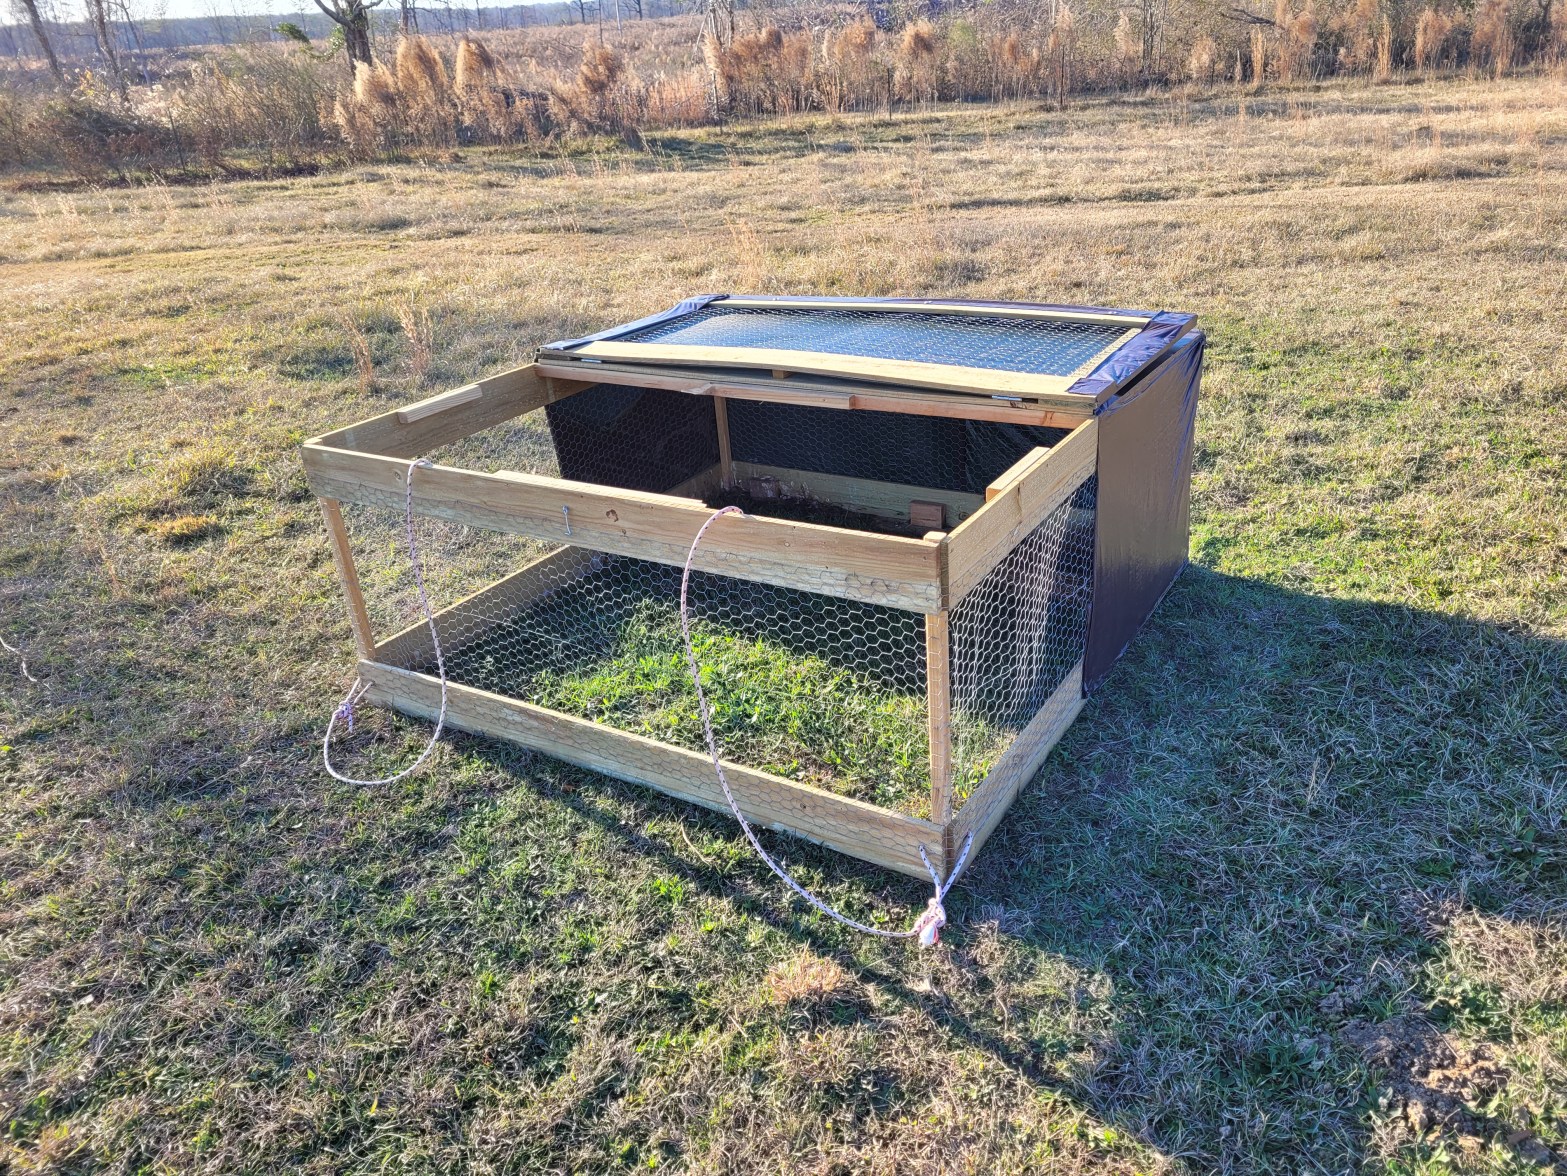
So back to the tractor. A tractor in this sense is merely a cage that can house all the chickens and be easily moved along the pasture by person power every day. There are a ton of different designs out there from the mild to wild and cheap to expensive depending on your goals. If you are going into production with the intention of selling pasture raised poultry meat, one might go with the larger, sturdier, and expensive designs for longevity.


In our case, we are just getting out feet wet in this endeavor, so we opted for light and cheap. Al Lumnah, at Lumnah Acres YouTube channel, has a version he made that cost about thirty dollars when he debuted the video a few years ago. As with most things, prices have gone up, but we were able to follow his designs and constructed ours for about fifty dollars. I will call that a win and leave a link here to his website with the plans we followed and a material list.
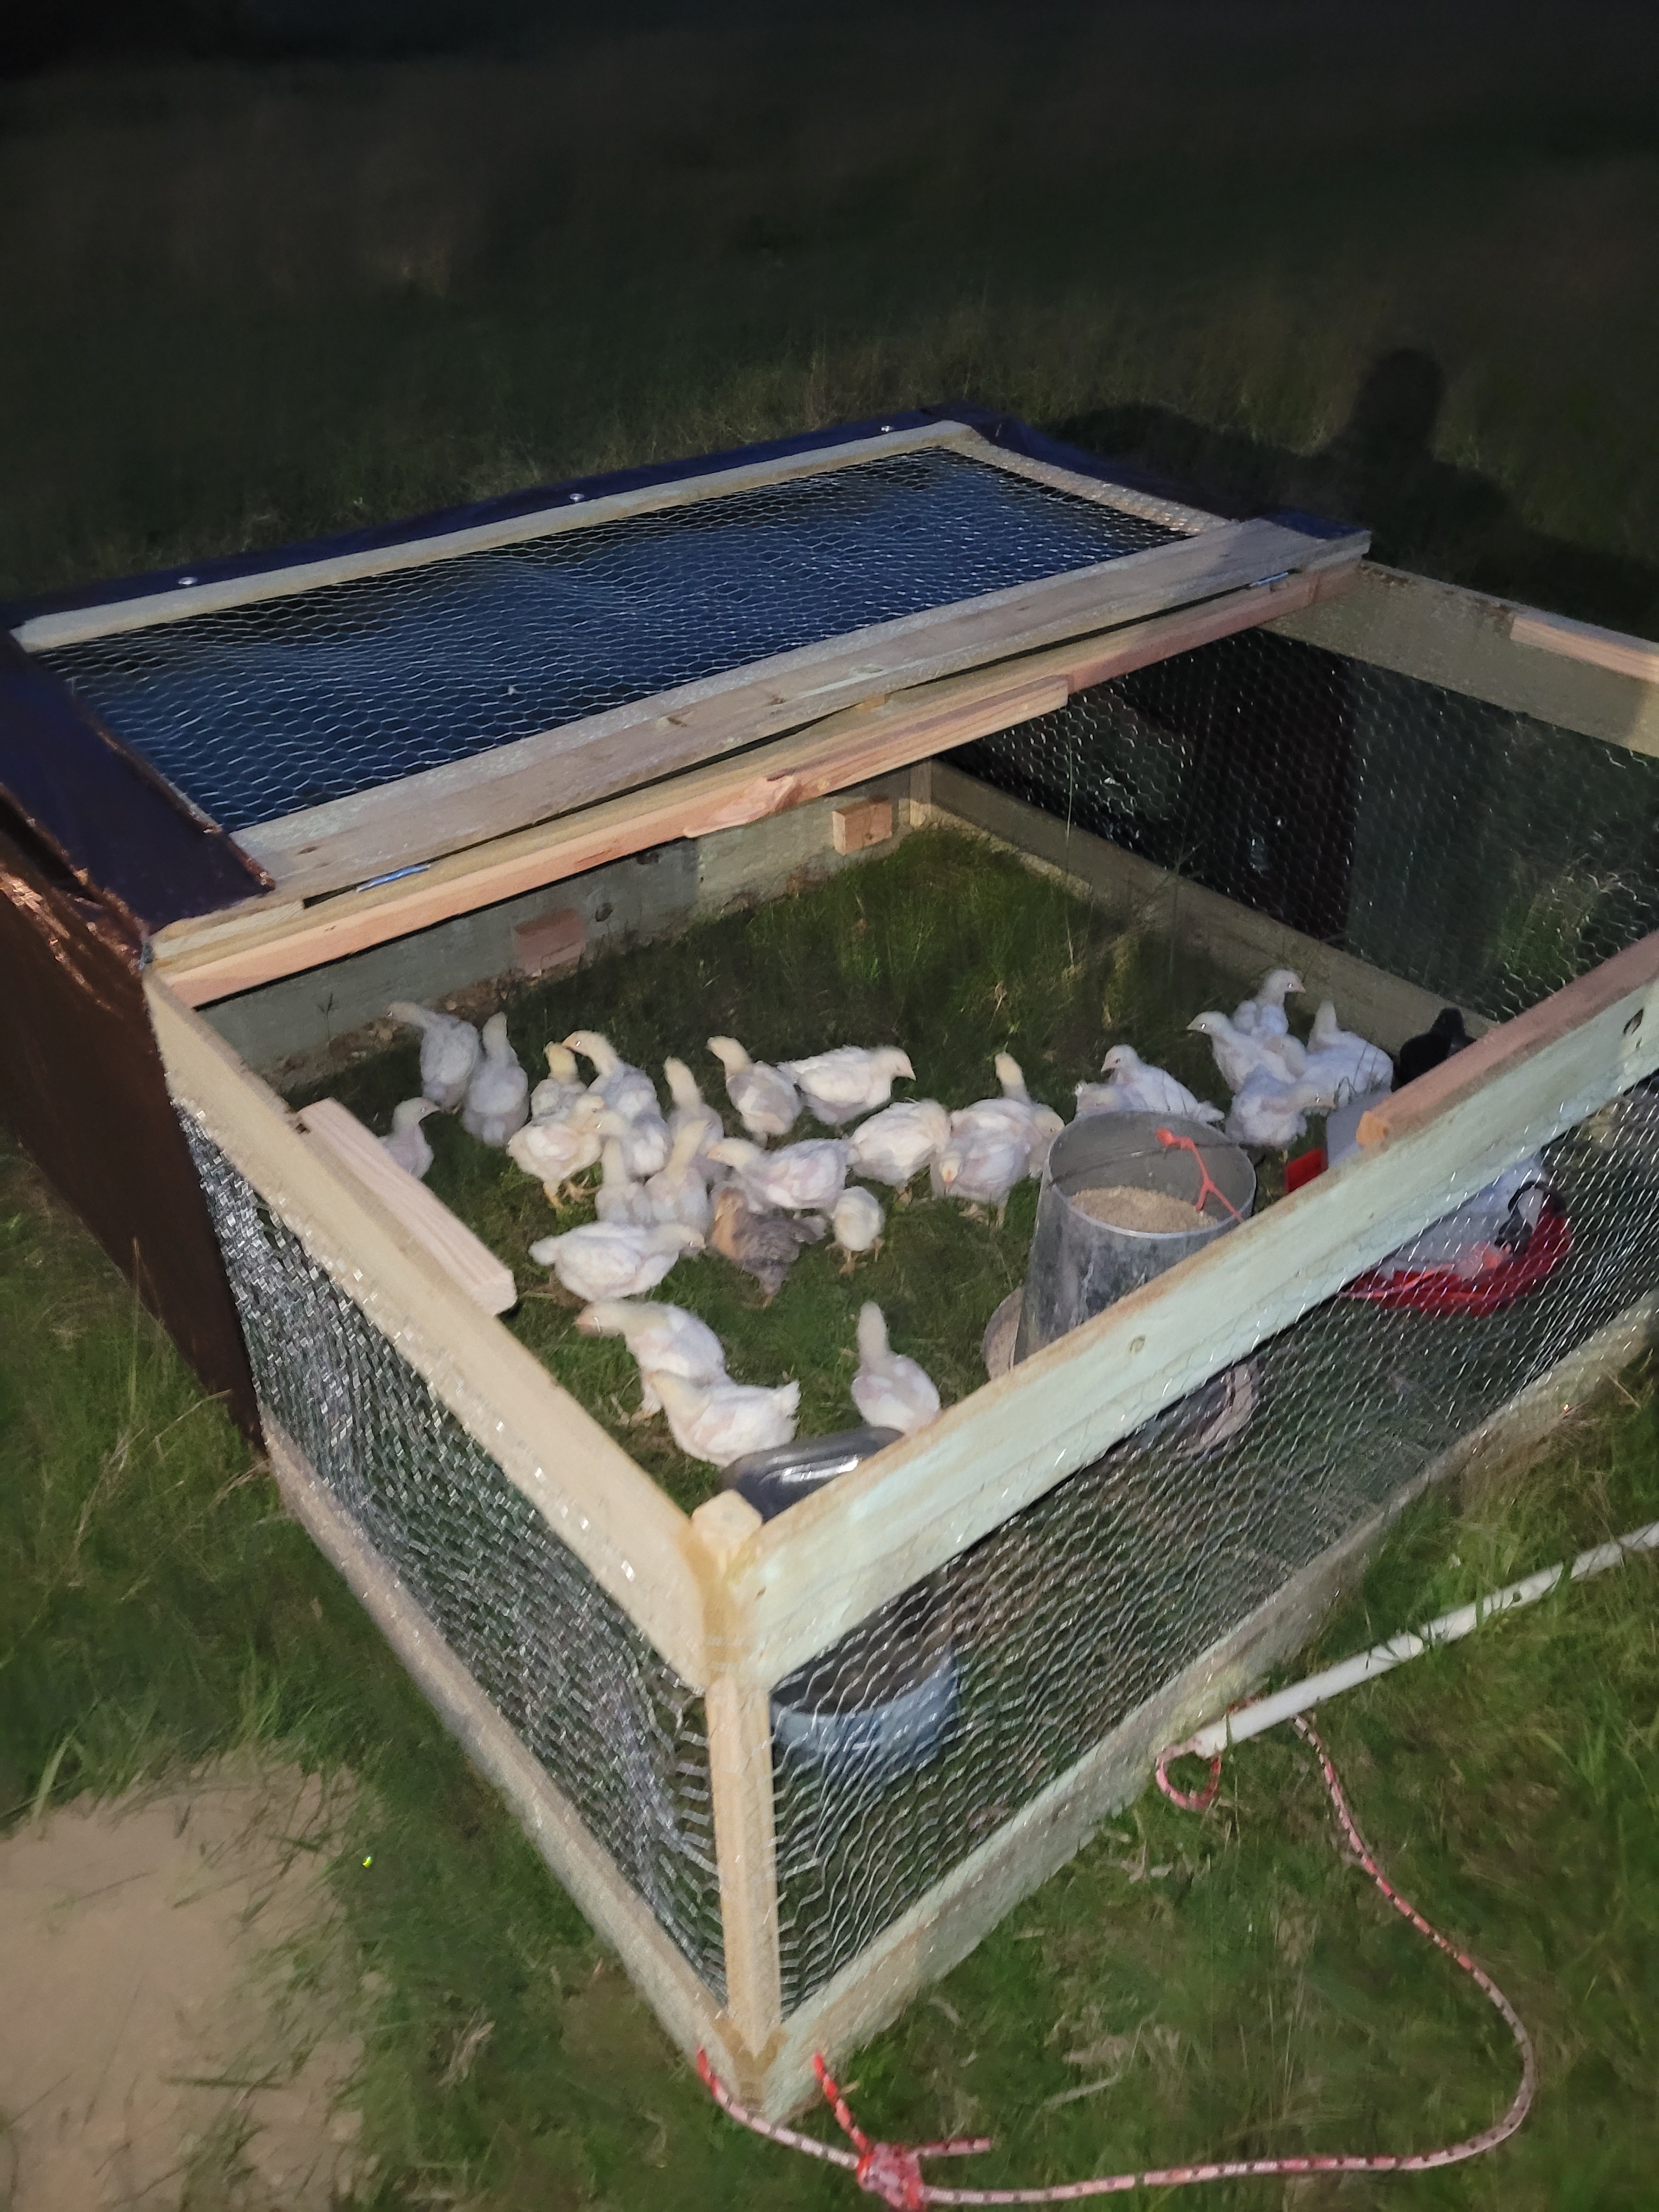
We finished it, as usual the day before we needed it. Using an old thirty-gallon muck bucket we loaded up chicks and moved them from the brooder to the tractor then set out their feed and water. The first night we both worried about them and I was up early to go check on them. They did fine over night but the move was a slow and difficult process. They were scared of me at the front of the tractor and would run back to the back as I was trying to pull it forward. They were still fairly small birds and would get feet caught under the back and get trapped. I would have to reverse to allow them to get up and try again. Very much two steps forward and one step backwards kind of situation.
It was nearing mid-October in central Mississippi when they went on pasture. They were small and feathered enough to withstand the coolness of the nights. Our first frost date is usually early to mid-November, so we had time to let them get older and heartier to the cold.
As things with our farm go, we failed to account for somethings and learned some valuable lessons over the next few weeks. I have no shame sharing our failures so that those of you who read and follow our lead learn from our mistakes and have better success on your first forays into this type of lifestyle.
The first failure was one that had actually started weeks before but didn’t become evident until about a week on pasture. We waited too late in the year. While it wasn’t frosting or freezing or snowing, it did begin raining. The rain itself wasn’t a bad thing, (as you can see, the tractor was covered with a tarp to keep rain out) however it did allow water underneath and we moved on to wet grass with each movement in the morning. The temps also dipped down in to the mid to upper forties during the nights. Wet and cold chickens tend to get sick and respiratory problems began cropping up. We started losing birds.
It was never more than one or two at a time but we lost birds regularly a couple times a week. It was disheartening and I felt like a failure. We took the ones we noticed were having respiratory issues to the brooder and treated them with apple cider vinegar water and a warm dry area. This helped for a time.
The second failure was a failure to provide. Our goal was to raise these meat birds on soy free feed. This was only a problem because the only soy free chicken feed I had readily available was only eighteen percent protein and generally recommended protein content for meat birds to grow out is around twenty-two. This caused our birds to grow slower than anticipated and therefore not handle the weather change as well.
After watching too many of our birds, including our mystery chick, die needlessly, we abandoned the tractor and moved the remaining birds into the unused horse stall. This gave them a ten-foot by twelve-foot area (nearly four times the area of the tractor) to live in. It also allowed us to hang a heat lamp in one corner in case they needed it. We still lost birds but not at the rate we were and there was little else we could do at this point but wait and see how many survived.

At the eight -week mark when most people are harvesting, our birds were still very under sized and not worth harvesting. We made the decision to allow them to grow to an acceptable size and then harvest. The next installment of the meat bird’s story will be their graduation to freezer camp and the challenges that come with on farm harvest.
Join us in the next phase and see the struggles and learning process of on farm harvesting solo on a budget! Thanks for joining us and have a Sunflowery day!
